Have a Question?
How to upload a worksheet
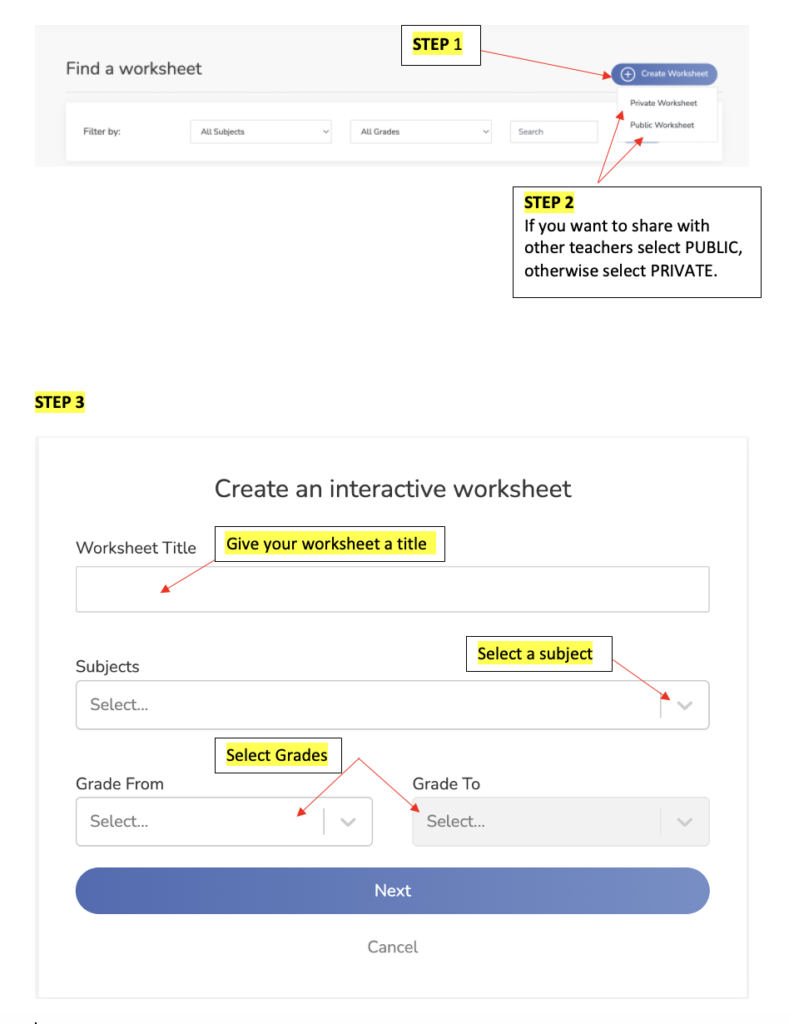
- To begin, click on the “Create a worksheet” button and choose whether you want it to be private or public. Private worksheets will only be visible to you, while public worksheets can be seen by all teachers in the “find worksheet” section. Public worksheets can also be reused and renamed by other teachers.
- Give your worksheet a name, select the subject, and specify the applicable grade range. This will ensure that the worksheet is suitable for the intended grades.
- Choose the appropriate subject for your worksheet.
- You have several options for uploading your worksheet. You can either upload it directly or drag and drop it onto the platform. Accepted file formats include PDF, JPG, and PNG. Alternatively, you can also upload a worksheet from your Google Drive, Dropbox, or OneDrive.
- Once your worksheet is uploaded, you can click on “Upload Additional worksheets” in the left panel to add and combine another worksheet. Alternatively, you can click on “Blank Page” to add a new page to the end of your uploaded worksheet. This allows you to create your own custom worksheet using different elements.
- Pro users have access to all of elements on the right panel, which they can use to complete the worksheet with answers or additional information.
- Free accounts, however, are limited to using some of the elements.
- If you wish to make changes to the worksheet’s name, click on the settings button located next to the publish button. This will allow you to edit the name accordingly.
- Once you have finished adding all the desired elements and making any necessary edits, click on the publish button to finalize and proceed to assigning the worksheet to a class or student.

Please accept YouTube cookies to play this video.
By accepting you will be accessing content from YouTube, a service provided by an external third party.
If you accept this notice, your choice will be saved and the page will refresh.
